February 22, 2018
Plastic Injection Molding: A Guide on Using an Epoxy Mold

The plastic injection molding industry utilizes numerous materials for their operations. Several examples of raw materials utilized in an injection molding process are nylon, polycarbonate, acrylic, and acetal.
Another example of a famous and high-grade injection material is epoxy.
Epoxy is a material that is famously used as a resin for producing plastic injection product.
Also, due to its versatility as a material, it can also be utilized for other purposes aside from a plastic injection resin.
Did you know that an epoxy could also be used as a mold and not just a resin?
If you want to know more about epoxy and how it could be utilized as a mold, then read on.
Epoxies have both chemical resistance and durability, thus making it a perfect material to be used as a coating. It is also very durable and strong and has a low level of moisture absorption
It has excellent electrical properties, making it highly resistant to electricity and extremely tolerant towards extreme hot or cold temperatures.
As an adhesive, epoxies are highly effective, especially when used on metals and other resins made of synthetic materials. It is also used as an adhesive when incorporated with other materials for construction.
Just like in any crafting project or science experiment, several safety procedures or steps must be done; the same goes for molding activities.
These safety guidelines must all the more be followed since chemicals, such as epoxy, is involved in the activity. Even though it is not a toxic substance, it is still a chemical compound and must be handled with caution. The following items must be observed properly for your safety:
Have Proper Ventilation – make sure that your work area has great ventilation to ensure that you will not be suffocated for the duration of the activity.
Wear Protective Gear – the initial for you to wear would be a pair of gloves. For those with respiratory concerns, put on masks over your mouth and nose. For extra protection, you could also wear safety goggles to protect your eyes.
In order to properly create an epoxy mold, you would need the following materials:
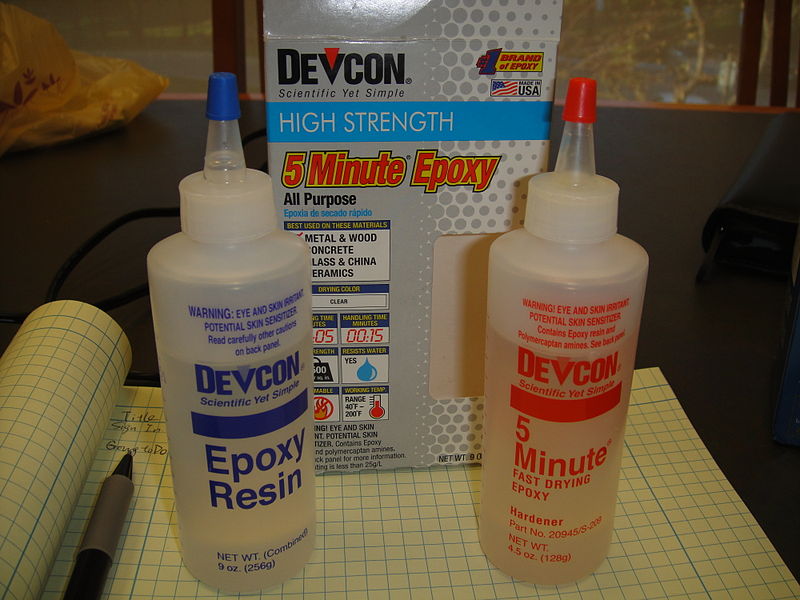
Epoxy – the quantity of this will depend on the size of the item that will be embedded in the mold. As much as possible, allot epoxy materials for creating the finished goods that will be produced from the created mold.
Molding Frame – a molding frame is essential to hold together the liquid epoxy. Choose frames that can be easily aligned to ensure a proper replica of the item to be molded.
Injection Molding Machine – although this is technically not part of the process of forming a mold, a plastic injection molding machine is needed for testing and producing the objects after creating the mold. A small and single shot machine will suffice.
Object to be Molded – any solid item can be used, but it is more advisable that it has a parting line in the middle for easier distinction between the sides.
Car Wax – this will create a barrier between the epoxy mold and the material used when producing copies of the model object from the mold.
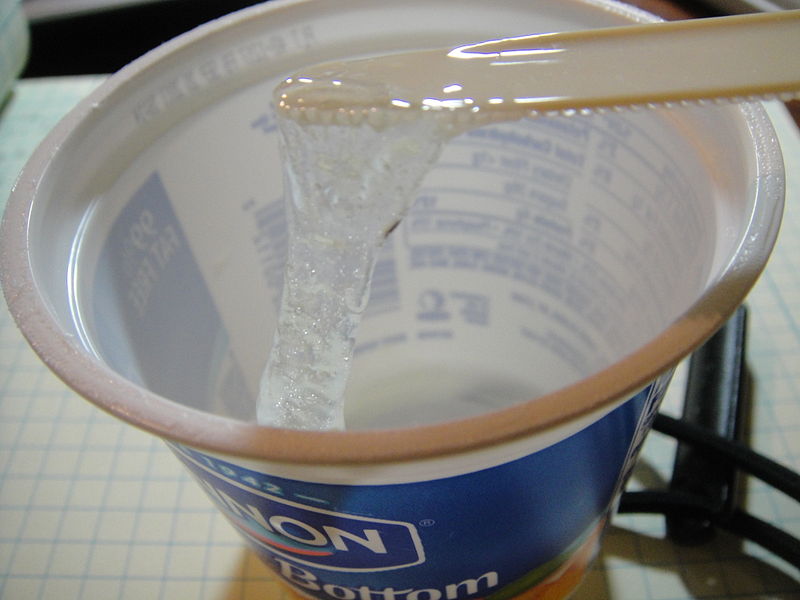
Due to the capacity of epoxy to achieve a low level of viscosity, it is a great material to work with when creating a mold.
Here are the steps to follow when creating an epoxy mold (in cases you are attempting to do it in your home).
Epoxy is a versatile material that is useful in the field of electronics and construction.
When working with epoxy materials, make sure to administer necessary precautionary steps and handle the materials with caution.
In creating an epoxy mold, materials needed aside for the epoxy are a molding frame, model object, car wax, and a small plastic injection molding machine.
There are numerous steps to follow in creating a mold out of epoxy, but remember that the steps done on one side is the same for the other side.
Partnering with a single injection molding provider streamlines operations by centralizing oversight of design, prototyping, production, and quality checks, slashing administrative burdens and miscommunications.
Read more
Plastic injection molding progresses through design for manufacturability, prototyping, precision tooling, material selection, automated production, and post-processing to ensure defect-free parts.
Read more
Scaling consumer product lines demands seamless integration to overcome supplier misalignments and delays.
Read more
Material selection profoundly affects the performance, durability, and user experience of consumer products.
Read more